iPubsoft Studio provides
Professional PDF Converter, ePub Creator and iPad/iPhone/iPod Tools
How to Transfer Photos, Videos & Songs from iPad Air to Mac/PC?

Oct 24, 2013 10:08 am / Posted by Sebastiane Alan to iDevice Tips
Follow @Sebastiane Alan
Coming with 5 megapixels camera and 1080p HD camcorder, you should take high-quality photos and smooth videos with the newly released iPad Air, the fifth generation iPad. You know, videos and photos you take with your iPad Air are generally saved on the iPad Air's Camera Roll. To share these media files easily with your friends and family or backup them in case of losing them some day, how to transfer photos, videos and audio files from iPad Air to computer would become a common question asked by many iPad Air users.
Haven't found a solution to transfer files from iPad Air to computer? Don't panic! The article here shows you a step by step guide of coping your iPad Air music, movies and photos to Mac or PC without any hassle. First of all, you should choose a professional tool to help you manage the transferring task. iPad/iPhone/iPod to Computer Transfer (Mac version is available) is such a reliable and user-friendly iPad Air file transfer to export pictures, movies and music from iPad Air to Windows or Mac computer with zero quality loss.
Download the iPad Air to Computer Transfer through the below buttons according to your computer system.


Steps to Transfer Videos, Music and Photos from iPad Air to Computer
In the following part, we are going to show you the step-by-step tutorial about how to move media files from iPad Air to computer running Windows operating system. If you are a Mac user, you can download and install the Mac version of the software and also follow the steps as below.
Step 1: Run the program and connect iPad Air to the PC
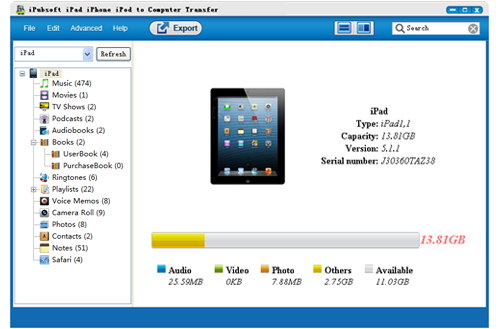
After downloading and installing the iPad Air to PC transfer program, launch it and connect your iPad Air to the same computer via the Apple provided data cable. Then, the program will detect your iPad Air automatically and show it on the main interface like the below screenshot.
Tips: All iPad versions are supported by this program, including iPad Air, iPad 4, iPad mini, The new iPad, iPad 2, etc.
Step 2: Select the media files you want to transfer
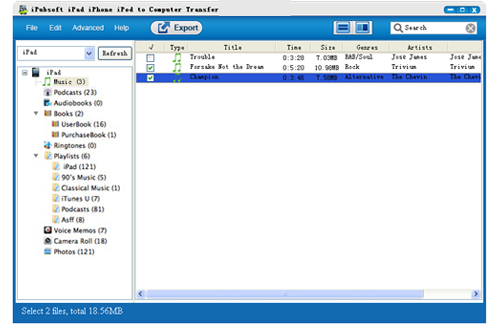
All the files in your iPad will be displayed in the left of the program interface by category. To export media files from iPad Air, you just need to choose the "Music", "Photos", "Movies" and "Camera Roll" categories. You can preview the contained files in the right window one by one.
Step 3: Click to begin the transference
After selecting all the media files you need to transfer, you can simply click the icon of ![]() to start the transference. Here will be a "Path" dialog pops up, asking you to specify an output folder for saving the exported files. After that, the transference will begin. After it's done, you can open the output folder to view the exported files.
to start the transference. Here will be a "Path" dialog pops up, asking you to specify an output folder for saving the exported files. After that, the transference will begin. After it's done, you can open the output folder to view the exported files.
In addition to videos, music and photos, more files on your iPad Air can also be copied to Mac or PC. After the transference, all your wanted files will be exported to your computer and you are able to share them to other people freely. Just download the transferring program to explore more features.


