iPubsoft Studio provides
Professional PDF Converter, ePub Creator and iPad/iPhone/iPod Tools
How to Transfer Photos from Android to Computer?

Aug 30, 2013 14:55 pm / Posted by Sebastiane Alan to Android Tips
Follow @Sebastiane Alan
If you are a photography enthusiast, you may have taken tons of photos with your Android phone and tablet. The increasing number of photos makes the available space of the device smaller and smaller. Also, there is potential crisis that once your Android phone and tablet is stolen or broken, all your photos will be lost. It is terrible!
That's why we need to backup Android photos to computer. It is quite simple that you just need to connect your Android phone or tablet to your computer via USB cable and then drag and drop the photos from your device disk to your computer. However, here is another way, which is easier and quicker to take photos from Android to computer.
You can draw support from iPubsoft Android Desktop Manager or Android Desktop Manager for Mac. Both versions are professional designed to help Android users to transfer and manage Android photos, music, videos, contacts, SMS, apps, etc. on Mac or Windows computer. With this application, it becomes pretty easy to transfer photos from Android to computer.
Download the free trial version from below on your Mac or Windows PC to have a try:


User Guide: How to Backup Android Photos to Computer?
Here, we take Android Manager for Windows as example. If you use a Mac, you can depend on Android Manager for Mac and take the similar steps.
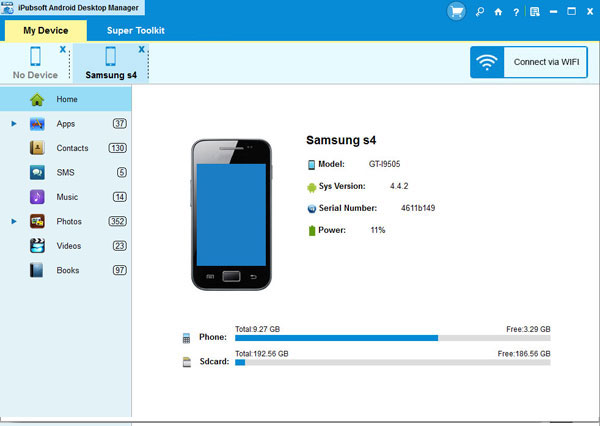
Step 1: Connect your Android device to the computer
Download and install the Android Manager on your computer, launch it and link your Android phone or tablet to the computer via a USB cable. Once your Android device is detected successfully by this program, all information on your Android phone or tablet will be displayed in the main interface.
You need to enable USB debugging on your phone before the scan. If you did it before, you can skip to the next step.
(1) For Android 2.3 or earlier: Enter "Settings" < Click "Applications" < Click "Development" < Check "USB debugging".
(2) For Android 3.0 to 4.1: Enter "Settings" < Click "Developer options" < Check "USB debugging".
(3) For Android 4.2 or newer: Enter "Settings" < Click "About Phone" < Tap "Build number" for several times until getting a note "You are under developer mode" < Back to "Settings" < Click "Developer options" < Check "USB debugging".
Once the USB debugging is enabled, click "Allow" on your phone to allow the program super user authorization when an Superuser Request pops up.
Tips: Almost all Android phones and tablets are supported by this program, such as Samsung, HTC, LG, HuaWei, etc.
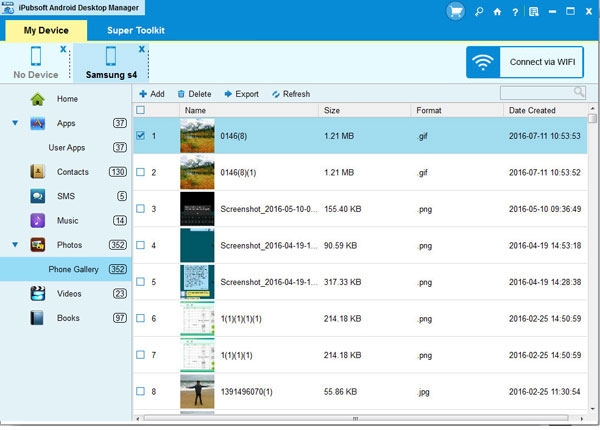
Step 2: Select the photos you want to transfer
Click the Scan button to let the program scan your Android device. After a few while, all files in your Android device will display in categories. You can click to open the Photos tab to show all the photos and pictures you saved in your Android phone or tablet. You can preview them and select the photos you want to transfer.
Step 3: Start to transfer Android pictures to computer
After you mark all the photos you want to transfer to computer, click "Start" button and choose an output directory for saving the output photos. Then, all the selected photos will be exported to the destination immediately.
Get iPubsoft Android Manager to transfer more files from your Android phone and tablet to computer.
Recommendation

Hot Articles
- Recover Data from Hard Drive
- Recover iPhone Messages
- Retrive Lost Photos
- USB Drive Data Recovery
- Recover Deleted Email Files


