iPubsoft Studio provides
Professional PDF Converter, ePub Creator and iPad/iPhone/iPod Tools
The Way to Export iPad Air Photos to Mac Selectively

Jan 8, 2013 5:35 pm / Posted by Sebastiane Alan to iDevice Tips
Follow @Sebastiane Alan
Have taken many photos with your iPad mini? Are there some well-taken photos that you want to make a backup to your Mac computer for a better memory in future. If you are looking for an easy way to back up those good pictures from your iPad to a Mac for the further memories, then you are coming to the right place. Here you will learn how to select and export your wanted photos from an iPad to Mac effortlessly without any hassle.
To make it much easier for you to copy the iPad photos as you want to a Mac, here I will share you with the solution provided by the well-designed iPad Files to Mac Transfer. With this transfer tool, you can feel easy to transfer many kinds of files selectively from an iPad 2, new iPad or iPad mini to a Mac with leisure. For example, you can easily export iPad photos to Mac as you want, transfer your favourites songs and videos to a Mac for further enjoyment, copy your precious ebooks, notes, playlists, and more to a Mac for a backup, and so on.
The whole transfer process lead by this iPad to Mac photo transfer tool is quite easy. Just three simple steps needed, you can export iPad photos to Mac as you prefer. Here is how!
Guide: How to Transfer Photos from iPad Air/New iPad/iPad mini to Mac?
First of all, to export your wanted photos from an iPad to a Mac, please first download and install the iPad transfer tool on your computer. (Note: For Windows users in need, you can just get the windows version to try out the iPad to Computer Transfer software.)


Step 1. Run iPad Photo to Mac Transfer Tool
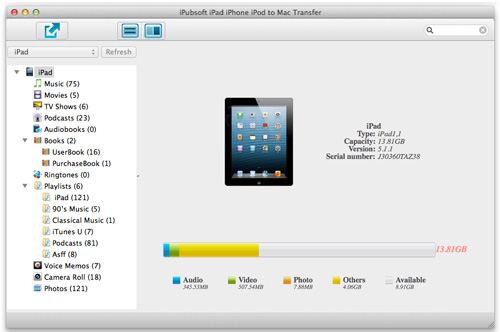
Connect your iPad to the Mac that you've installed the transfer tools. After that, run the iPad transfer app on your Mac. And then you will find that the software is detecting your connected device automatically. The detection will finished before long with your iPad file library listed in the left panel and the iPad device details showed in the right panel.
Step 2. Select Photos from iPad
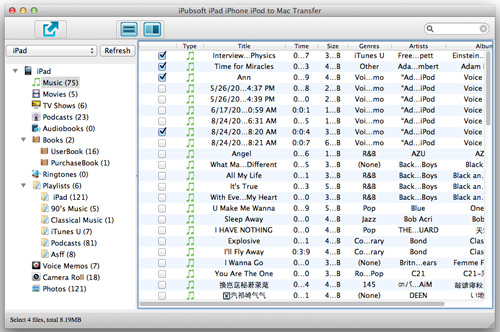
Move your cursor to the left library part to click the "Photos" or "Camera Roll" option to unfold all the photos categoried under the options in the right window. And then you can simply check the photos you want to back up to the Mac.
Step 3. Export iPad Photos to Mac
Have chosen all the photos/pictures as you want? Well, then you can move your cursor upward over the ![]() button to give it a simple click to makeyour selected iPad music files to Mac locally.
button to give it a simple click to makeyour selected iPad music files to Mac locally.
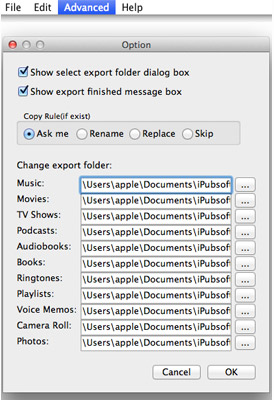
Hints: If you didn't change the export destination before you start the transfer task, then the photos you selected will be exported to the default file folder. Once you want to export iPad photos to a specified Mac local folder, then you can go to the top menu bar to hit "Advanced -> Options" to adjust the export destinations as you want.
Once you've finished all the steps listed in the above tutorial, the transfer program will export your selected iPad photos to Mac quickly. Ok, the rest you need to do is just to get a cup of coffee to wait for a little while. And the transfer app will make the task for you befor long. Sounds easy? Go ahead to try it out for youself right now!


