User Guide - How to Make PDF Step by Step?
PDF is a great way to offer your work to public without being afraid someone will steal your content. Wondering how to create PDF documents without spending too much money on Adobe software? It's really simple! iPubsoft PDF Creator is specially developed to make PDF files from image, text and word (.docx) file. The following guide is about how to use the program to make PDF files step by step.
1 Add File
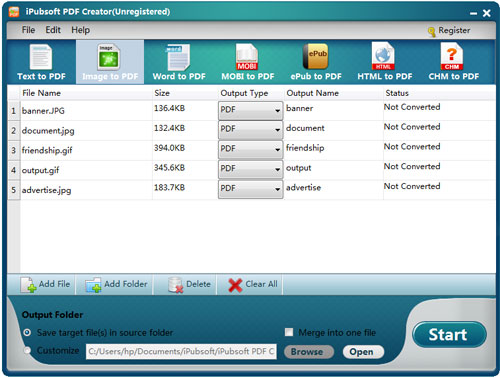
After launching the software on your PC, the first thing you need do is selecting the conversion type on the top: Text to PDF, Image to PDF or Word to PDF. If you choose Text to PDF, you can load files in TXT format. If you choose Image to PDF, you can load images in JPG, PNG, BMP, ICO, GIF, etc. Or you can load DOCX format Word file once you choose Word to PDF.
At the bottom, you can see a line of toolbars: Add File, Add Folder, Delete, Clear All. To import files, click Add File or Add Folder button to locate your needed TXT, DOCX or picture files, then load them in a batch.
You can also directly drag plain TXT, DOCX or images and drop them into the pane. Once loaded, file information will appear in the file list, including File Name, Size, Output Type, Output Name, Status.

2 Set Output
The default is saving output result PDF in source folder. If you want to choose another one, check Customize, and click Browse button to choose your desired one.
3Start creation
After making all necessary settings, click Start button at the bottom right corner to begin PDF creation. During the creation, a status bar will show you how much is processed. If it appears 100%, all is done successfully. And now you can click Open button to get the created PDF.
4Merge (Optional)
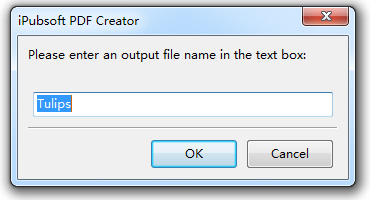
If you want to merge multiple text files into one PDF, or combine more than one image file into a single PDF, Merge option can help you a lot. Check "Merge into one file", hit Start button, then you will get a pop-up window to ask you for entering the merged file name.


