iPubsoft Studio provides
Professional PDF Converter, ePub Creator and iPad/iPhone/iPod Tools
Manage Partitions on Windows without Downloading Any Software

Feb 21, 2013 5:30 pm / Posted by Sebastiane Alan to Recovery Tips
Follow @Sebastiane Alan
Certainly you can use third-party partition management software to manage partitions on Windows. But do you know that Windows has a built-in Disk Management tool that enables you to resize, delete, create, format partitions and even change their drive letters? The built-in program is well hidden by Microsoft. But in this article, we will explore all the great features of this tool. Believe it or not, you can manage your partitions now without extra pay.
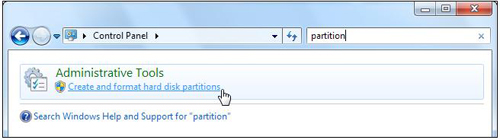
Tip 1: Launch the Disk Management tool
The most direct way to run the built-in program is turning to the Control Panel or Start menu and inputting "Partition" into the search box. Then, hit the option "Create and format hard disk partitions" shows like the below picture. After that, you'll see a window with two panes. The above one shows you the partitions condition and the bottom one shows you a graphical representation of your storage devices.
Tip 2: Resize a partition
Right-click on a partition that you want to resize and select "Shrink Volume" or "Extend Volume". Use this tool to shrink partition has some obvious limitations. For example, you can only shrink a partition that has enough unallocated space on the right of the partition. It doesn't allow you to extend a basic partition to its left.
To remove this limitation, you will need a professional partition management program like iPubsoft Partition Manager. The downloading links for Windows and Mac versions are available:


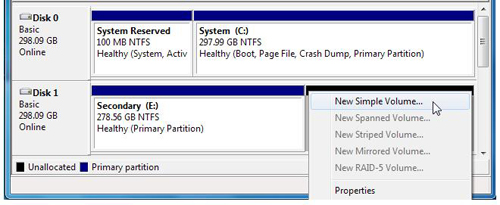
Tip 3: Create new partitions
After you expand the existing partition, you can create additional partitions in the free space. To do this, you just need to right-click inside the unallocated space and choose the option of "New Simple Volume". A wizard will appear to guide you through the process of creating a new partition.
Tip 4: Formatting a partition
Right-click a partition and select the "Format" option with a new file system and erase its contents. You can also right-click on the partition in Windows Explorer and choose Format option to format a partition.
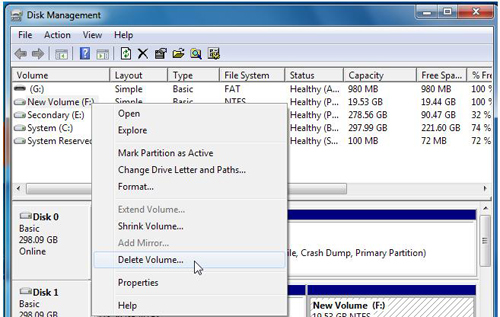
Tip 5: Delete existing partitions
You can simply delete a partition by right-clicking on the partition and choose "Delete Volume". This action can free up space, but at the same time, every single file on the partition will be deleted too. So please think twice!
Tip 6: Change drive letters
You can also use the "Change Drive Letter and Paths" option in a partition's right-click menu to change its drive letter. Click the Change button to choose a new drive letter you like.
Recommendation
Hot Articles
- Recover Data from Hard Drive
- Recover iPhone Messages
- Retrive Lost Photos
- USB Drive Data Recovery
- Recover Deleted Email Files


