iPubsoft Studio provides
Professional PDF Converter, ePub Creator and iPad/iPhone/iPod Tools
User Guide: How to convert JPEG images into Adobe PDF on Mac computer?
The step-by-step guide is written for Mac users to convert JPEG pictures into PDF with iPubsoft.
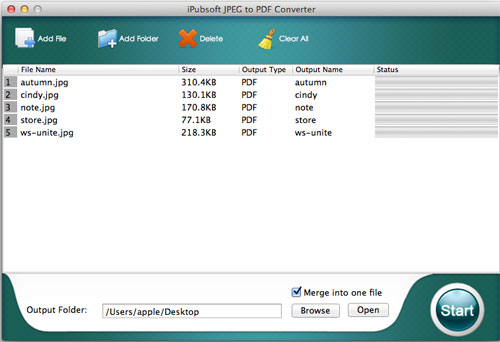
1 Add JPEG files
In total, you have 3 options to load JPEG image files:
The first option to import files is using drag&drop operation, which is the easiest and directest way to add files.
The second choice of adding JPEGs is clicking the button: ![]() or
or ![]() . In the pop-up dialogue, you can browse and locate the folder where contains JPEG image files.
. In the pop-up dialogue, you can browse and locate the folder where contains JPEG image files.
The third way is adding files via clicking "File" > "Add Files..." from the top menu.
If you wanna remove one or all imported files from the program, the button of ![]() or
or ![]() can help you.
can help you.
2 Output settings
The default option: Merge into one file, allows you to save imported JPEGs into one single PDF document. If you don't need to merging feature, you can uncheck the box.
Click ![]() button to customize an output directory for the created PDF file.
button to customize an output directory for the created PDF file.
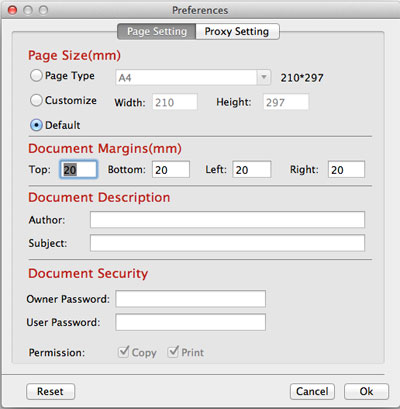
The converter allows you to set PDF margins by clicking "Edit" > "Preference":
3 Begin conversion
After finishing all necessary settings, simply click the ![]() button to kick off the conversion.
button to kick off the conversion.
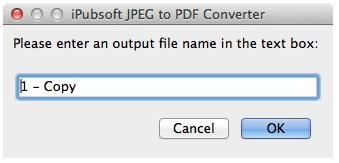
If you haven't uncheck the Merge option, then you will have to type an output name for the merged PDF file.
What People Say
"I am so satisfied with the result. Should you have the need to convert JPEG photos or other formats into Adobe PDF document, I would suggest you try iPubsoft JPEG to PDF Converter for Mac."- by Jenny, from London
"I want to send photos to my friend via email. However, his computer cannot recognize JPEG format for some unknown reasons. My colleagues introduced iPubsoft JPEG to PDF Converter for Mac to me. After conversion, I send the created PDF to my friend. All problems are gone."- by Johnson, from New York
Awards