iPubsoft Studio provides
Professional PDF Converter, ePub Creator and iPad/iPhone/iPod Tools
How to Recover Formatted Photos from Windows 8?

March 8, 2013 9:57 am / Posted by Sebastiane Alan to Recovery Tips
Follow @Sebastiane Alan
You just fully formatted your have drive and lost all the photos in it. These photos stand for precious memory that you never want to lose. Is there a way to recover formatted photos? Don't panic! When you format a hard drive, it seems that all the data saved in the hard drive are lost. But they are not wiped actually. They are marked as blank place that you can't see but can still get them back as long as there is no new data overwrite the blank place. That's to say, once you find important data missing on your hard drive, stop using the hard drive to avoid lost data being overwritten.
Let's go back to the topic: how to recover formatted photos from Windows 8? You need a photo recovery program that should be compatible with Windows 8 to help you. If you have no idea which one to choose on the Internet, you can have a try with iPubsoft Data Recovery, which works well with Windows 8 and enables you to retrieve formatted pictures from Windows 8 easily. Not only formatted photos, this data recovery software can also help you get back lost videos, songs, documents from all types of devices.
Tips: Download the free trial version of the Formatted Photo Recovery for Windows 8 to have a try. Please note Do Not install the program on the same partition where you lost your photos. Mac version is also available.


User Guide: How to Restore Formatted Photos from Windows 8?
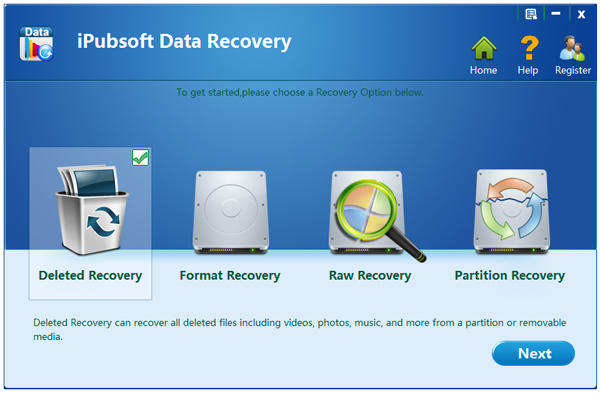
Step 1: Scan the target partition
Launch the photo recovery on your Windows 8 computer and you'll get the interface as follow. Four recovery options are provided. You can choose the "Format Recovery" and click "Next" to continue.
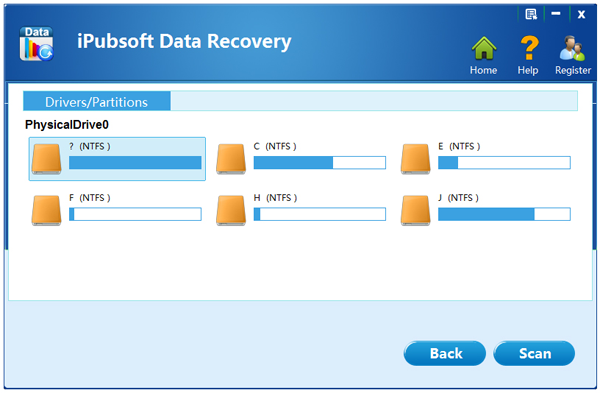
Step 2: Preview and select the pictures you want
All the partitions on your hard drive are detected and displayed. Just select the one where your formatted photos were placed and click the "Scan" button to find those formatted but hadn't been overwritten photos. After the scan, all found files, including photos, videos and audio files will be displayed in categories. To recover photos, just choose the photos and preview them one by one.
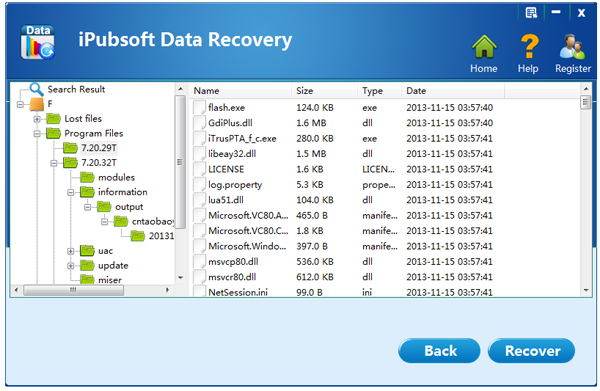
Step 3: Begin to recover formatted photos
Mark those photos you want to restore and click the "Recover" button to save them on your computer with one click.
The photo recovery software also comes with Mac version. If you are using a Mac computer, you can free download the Mac version below to explore its features.
![]() Download Data Recovery Free Trial Version >>
Download Data Recovery Free Trial Version >>
![]() Download Data Recovery for Mac Free Trial Version >>
Download Data Recovery for Mac Free Trial Version >>
Recommendation

Hot Articles
- Recover Data from Hard Drive
- Recover iPhone Messages
- Retrive Lost Photos
- USB Drive Data Recovery
- Recover Deleted Email Files


