iPubsoft Studio provides
Professional PDF Converter, ePub Creator and iPad/iPhone/iPod Tools
How to Transfer iPhone Videos to Mac?

December 19, 2012 10:26 am / Posted by Sebastiane Alan to iDevice Tips
Follow @Sebastiane Alan
It is really a wonderful thing to shoot photos or videos for whatever you see on the go with iPhone 4S and iPhone 5, which has been equipped with high pixel featured camera. Have you ever taken any amazing video clips with your iPhone 4S or iPhone 5? Do you want to transfer the fantastic videos you've taken on your iPhone to a Mac for specific uses? For example, make a backup of the iPhone recorded stunning videos on a Mac to cherish forever, edit the great iPhone videos in iMovie to make them more fantastic, etc.
Once you are trying to transfer iPhone videos to Mac for whatever purpose, you may be for the best yet most convenient way to implement your idea, right? Actually, there are kinds of solutions for how to transfer videos taken on iPhone to Mac. For example, you can send your captured videos clips on your iPhone over to the Mac through email or iMessage. But, there will be a certain degree of distortion of the video quality. And this way is not suitable for the large sized iPhone taken videos or the movies you collected on your iPhone.
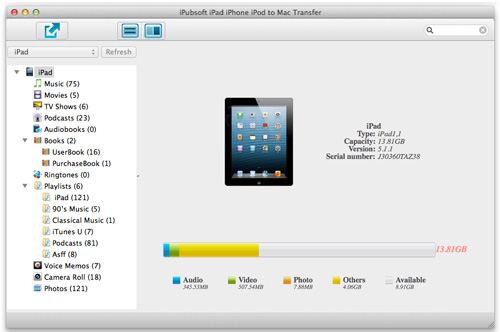
To make things much easy for you to transfer videos taken on iPhone to Mac and download your iPhone movie collections to a Mac perfectly, here I'd like to suggest you to try out the iPubsoft iPhone to Mac Transfer. It provides you a convenient way to transfer iPhone videos to Mac with just a few simple mouse clicks needed. Here, you can get the very guide to learn how to transfer movies from iPhone to Mac easily with this software.
Easy Way to Transfer/Download Videos from iPhone to Mac
To transfer your wanted videos or movies from iPhone to your Mac, please first get the transfer tool downloaded and installed on the Mac you will transfer and save your iPhone videos. (Note: For Windows user, please try out the iPubsoft iPhone to Computer Transfer for yourself.)


Step 1. Connect Device and Start Software
Connect your iPhone to the Mac that you want to save the videos or movies. Launch the transfer tool, and it will automatically detect the iPhone you've linked to the Mac.
Step 2. Select Files
After the a few seconds of detection, you will see a file category list of your iPhone in the left panel. Just move your cursor over "Camera Roll" or "Movies" to select your iPhone take videos or downloaded movies that you want to transfer to your Mac.
Step 3. Transfer iPhone Videos to Mac
Check if all the movies or video clips you prefer to transfer have been picked. If yes, then just click on the "Export" tab from the head portion of the software interface to download your selected videos from iPhone to Mac.
Hints: All the downloaded iPhone videos will be saved in the default video export folder if you didn't define one before the transfer. Whether you have changed the export destination or not, you can quick access to it by clicking "File -> Open Export Folder" from the top menu on your Mac screen.
Well, it is such an easy and convenient task to transfer iPhone videos to Mac with this specific transfer tool. In addition to the collected movies and iPhone taken videos, the music files, ebooks, photos, voice memos, etc. stored on your iPhone can also be transferred to Mac in similar easy operations using this tool.


