iPubsoft Studio provides
Professional PDF Converter, ePub Creator and iPad/iPhone/iPod Tools
How to Transfer Contacts/SMS from Google Nexus 4/5 to Computer?

July 31, 2014 10:19 am / Posted by Sebastiane Alan to Android Tips
Follow @Sebastiane Alan
Just got a new Google Nexus 5 and go in for the marvelous features coming with it? You must can't wait to transfer all the data from your old Google Nexus 3 to the new Nexus 5 so as to experience its new features with abandon. However, the switch of phones also bring some troubles, one of which is how to transfer these important contacts and private text messages from your old Google Nexus 3 to the new Nexus 5? But just keep calm, this article is just for you here.
For transferring data between two Google Nexus phone, most people think about using computer as the middleman. Trying to copy data from Google Nexus 3 to computer and then you can transfer these files to your new phone without any trouble. In that case, how to move contacts, as well as text messages from Google Nexus 3/5 to computer? Well, to complete the transfer task, you should ask help from a professional Nexus data transfer tool.
Simple Way to Move Contacts/SMS from Google Nexus to PC by Android Manager
Here is a very reliable one: iPubsoft Android Desktop Manager (Mac version: Android Desktop Manager for Mac), which is professionally designed for Android users to transfer and manage data from Android device to computer. It is easy for you to copy contacts and text messages from Google Nexus to PC or Mac and restore them to your Android phone easily with one click. Both versions support all popular Android phones like Samsung, HTC, Motorola, Google, etc.
Now download the free trial version of the Nexus to Computer Transfer tool and follow the guide below.


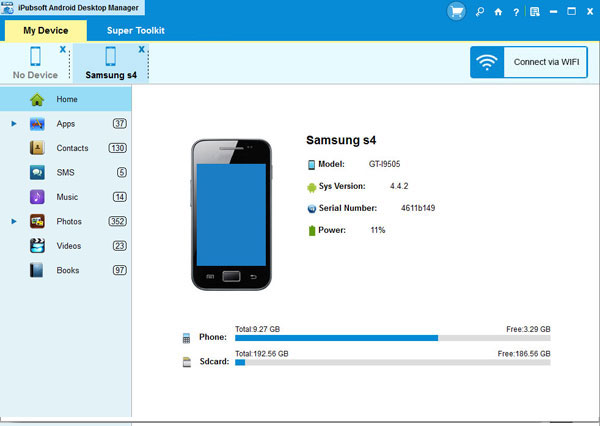
Step 1: Connect your Nexus 3/5 to the computer
First of all, install this Nexus to Computer Data Transfer app and run it on your computer. Then, you will see the prime window is displayed on your computer desktop.
Note: If it is the first time to run this software, you need to enable USB debugging on your phone. If you did it before, you can skip to the next step.
(1) For Android 2.3 or earlier: Enter "Settings" < Click "Applications" < Click "Development" < Check "USB debugging".
(2) For Android 3.0 to 4.1: Enter "Settings" < Click "Developer options" < Check "USB debugging".
(3) For Android 4.2 or newer: Enter "Settings" < Click "About Phone" < Tap "Build number" for several times until getting a note "You are under developer mode" < Back to "Settings" < Click "Developer options" < Check "USB debugging".
Once the USB debugging is enabled, click "Allow" on your phone to allow the program super user authorization when an Superuser Request pops up.
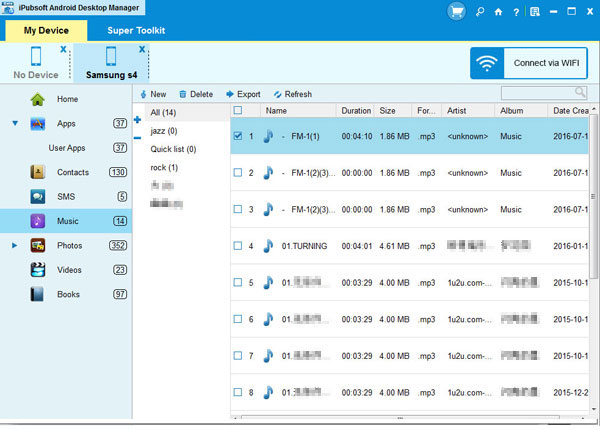
Step 2: Preview and Select the Text Messages and contacts
Go to the top menu where all your phone data are categorized, select the Contacts tab and choose "All Contacts" and "All SMS" in the new window. Preview all the short messages and contacts saved in your Google Nexus and select those you want to transfer to your computer.
Step 3: Start transferring the selected files to PC
After marking all the target contacts and text messages, you can click "Export" button to save them on your computer. A pop-up window will appear, asking you to choose an output location where you want to save the exported data. After specifying the output destination, the transfer process will begin at once.
Recommendation
Hot Articles
- Recover Data from Hard Drive
- Recover iPhone Messages
- Retrive Lost Photos
- USB Drive Data Recovery
- Recover Deleted Email Files


